|
Our Cars Q to T |
|
|
|
|
 |
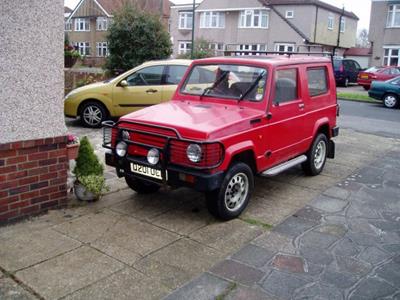
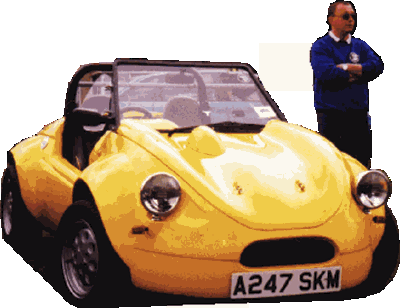
Quantum 2+2 Sonia's 2+2, bought in 1997. This car has been to Switzerland twice, and also took part in a sponsored reliability run from John O'Groats to Lands End. 11 Quantums completed the End-to-End run in 22.5 hours and raised a total of £10,000 for charity. Most recently we drove it to North Cape, the most northerly point in mainland Europe |
 |
Quantum Saloon
Pete's saloon, bought in 2003 |
 |
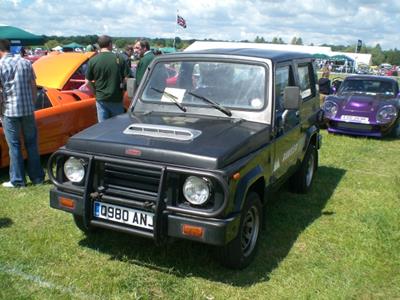
Quantum H4
Sonia's H4, bought in 2004 |
 |
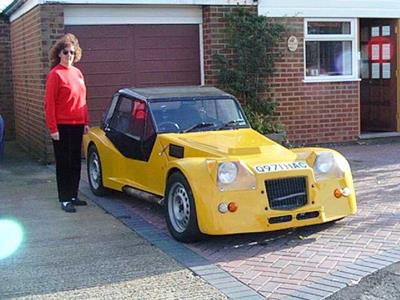
Quantum 2+2
Hilary's 2+2 Powered by Ford 1600 Fiesta based |
 |
Quantum H4
Chris's H4 |
 |
Quantum Saloon
Ian's Saloon |
 |
Quantum 2+2
Ben's 2+2 Powered by Ford 1400 CVH Fiesta based |
 |
Quantum Saloon
Darren's Saloon, brought in 2007 |
|
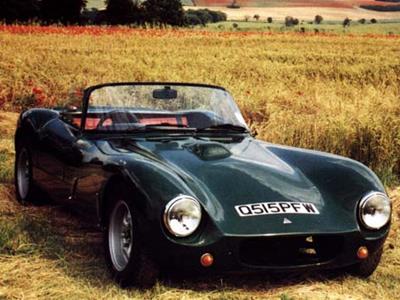
Raw Striker
Anthony's Raw Striker The vehicle was built by myself, took 4 years! It is fitted with a Toyota 4AGE 16v Engine with Twin 45's |
 |
Rickman Ranger
Ian kindly sent the following information about his car: Known as the 'Grotmobile', it's a fantastic workhorse in constant use in mostly mucky surroundings on my allotment or towing trailerloads of manure for either myself or fellow allotment holders. I've just towed back a cherry picker (1.6 tons) from Wolverhampton for one of my brothers! It's a 2.0 litre Pinto powered 1989 Rickman Ranger with 5-speed box, Vulcan Head, fast road cam and 4 branch manifold, straight through single silencer with side exit exhaust. Its phenomenally reliable, certainly goes well and sounds fairly fruity. |
 |
Rickman Ranger |
 |
Robin Hood MK2 |
 |
Robin Hood |
 |
Royale Sabre
Geoff Gooch's Royale Sabre |
image from and copyrighted by TKC magazine |
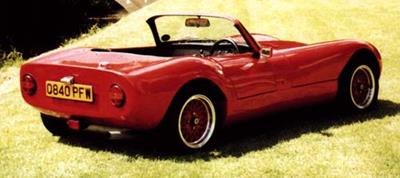
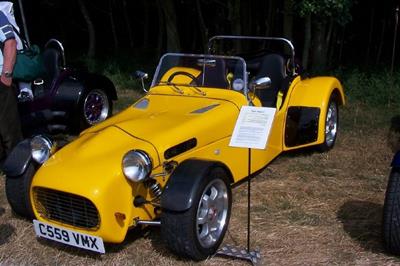
Sebring Exalt
Rose and Robin's Sebring Exalt Last month, we purchased (rather than build) another Sebring, this time it's an Exalt and the only one currently on the road in the UK (other than Sebring's older demonstrator).A little bit of info is as follows (wording courtesy of extracts from Steve Hole's article in TKC mag):
|
 |
Sebring MXR
Rose and Robin's (silver) Sebring MXR Started January 2006 and completed March 2007
|
 |
Sebring MXR
Andy's Sebring powered by a fuel injected 4.6 Rover V8. The build was completed & SVA'd in Dec 07 and has since covered 13k miles as of Nov 2010, 4k of which were done on several trips to France, Germany, Italy & Switzerland. |
|
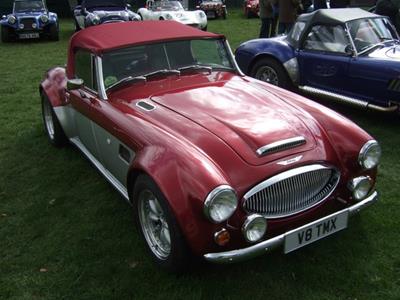
Sebring TMX
Chairman Chris's Sebring This classically styled car was built over an 18 month period and was completed in June 2008. It takes it inspiration from the classic Austin Healey 3000 and may well reflect the way that particular classic would have evolved. The "kit" is marketed by "Sebring International" and is one of 3 model variants produced by them. The quality of the chassis, etc is superb and the fibreglass mouldings are also of very good quality. This example features a 5.7 Litre Chevrolet V8 engine that has been completely rebuilt using all new components and produces approximately 350 bhp and loads of torque!!! A Suitable Tremec T500 5 speed gearbox handles the power and helps it on its way to road via a purpose built Limited slip differential. The suspension is as supplied by Sebring International and follows the ideal double wishbone layout at each corner. All work on the car was carried out by the owner/builder, with the exception of paintwork (done by "Full Circle" at Marden, Kent.), seat manufacture by "interior Foams" of Mansfield, and some stitchwork by a local trimmer. All work was carried out at home in my small garage, with the odd incursion indoors when the wife agreed, or didn't know !!! It passed the "Dreaded SVA inspection" 1st time with several complimentary comments from the VOSA Inspector ! It's a joy to drive and own, with virtually nothing to beat it when the hood is down and you're pressing on !!! If you want any more information on the car, please talk to the owner/driver - Chris Pecover : who won't be very far away !! |
 |
Sylva Fury |
 |
Sylva Fury |
 |
Sylva Jester
Steve and Chris's Car |
 |
Sylva Jester
As you know the Jester has finally hit the street and as promised a short item. Writing this is also a good way of getting a break from the patio that needs so much time. The build of the yellow peril began with the purchase of a MOT failed mk1 fiesta 1.3.in June last year. The strip down took all of about 2 weeks, cutting up the body taking longer than anything else - since the passenger side floor had dropped out when I stood inside to remove the seats you can guess that it really was not a big job! The sale of various items not needed for the build reduced the cost of the donor to about 40 pounds. A full refurbishment of all items followed over the next few weeks - all bearings, rubbers and other service items were replaced. As I had not worked on a front wheel drive car before it came as a shock to find that the front wheel bearings are torqued at 200lbf ft. And the nuts are staked as well just for good measure. In removing the nuts in order to replace the wheel bearings I bent and broke various bits of a cheap 1/2" drive socket set. A new 15" knuckle bar and a length of scaffold pole with the hub set in a vice did the trick - in the end. The kit was ordered at the Sandown show in august, for collection in September. The van I hired for the trip seemed to drink fuel like there was no tomorrow but after a long and quite eventful 14 hours the chassis and body were in the well-organised garage and the build could begin. It has to be said that the build-up guide is sparse - two A4 pages from the Jester Centre and about 6 A4 from Sylva - but the thing goes together so easily that much more would be a waste of paper. The Jester Centre was always ready to help on the phone and a visit to them about three weeks after I started the build gave me most of the answers that I needed. After a weeks holiday at the end of October I collected a rebuilt engine and two days later the car moved under its own power - minus body etc, but things looked good to beat the SVA threat - then due 1st Jan 1998. Things progressed at a pace and the week before Xmas 1997 I planed to get the car MOT'd so it could be taken to Maidstone in the week between Xmas and New Year. A check on functions showed the screen wash not working. I suspected the switch to be the problem and acquired a replacement - that did not work. Investigation showed that the wiring loom in my donor did not match up with the Haynes manual - different wire colours, fuse numbers and the fact that it had a continuous live feed had me scratching my head for some time. A phone call to the Jester Centre on the Thursday of the week in question - the day I had planned the MOT even though it was snowing - got the response "You've got an earthing problem - but don't worry they have just postponed SVA until 1st May next year" I was unsure if I should laugh or cry. After some late nights to beat SVA I decided to leave my problem alone and get on with sorting out Xmas - a wise move as Lesley was still talking to me - just! A few days later Terry Sullivan lent me a meter and after a few hours
of playing around I found the problem, the column was not earthed out -
I guess the powder coating on the chassis was the problem. With time on
my side I decided to delay the MOT until the weather improved and tackle
one or two other jobs that had been over looked in the haste. The heater
fan was found not to work and the carb had a nasty habit of letting a light
blue flame pop out the top every now and then. This latter point was a
bit of a worry since the bonnet sits about 1/2" from the top of the carb
and gives no room for a normal air filter. The carb was checked over by
DB engineering and condemned as unfit for a rebuild. A search for a replacement
that would not break the bank ensued. In the mean time the heater fan was
given attention. The heater is the first thing that goes inside the Jester
in the build and as a result is not easy to remove. I decided that the
fan motor just needed a bit of lubrication with WD40. Attempts to spray
with out removing the heater had proved impossible so I decided to drill
a hole in the body above the fan in a position that would be hidden by
the bonnet and small enough so it could be filled with mastic. After much
measuring a 5mm hole was drilled. It was too small to see if I had got
the right place but with nothing to loose I picked up my brand new can
of WD40 (having used up the previous one) attached the little red straw,
put the straw in the hole and pressed the nozzle. As this article may be
read
Three hours later the heater finally came loose but I was unable to get it out of the footwell unless I removed either the seat or the centre console. So I left it for the evening and returned next day to find that it would come out if it was rotated a certain way. Having removed it I was able to recover the red straw and a spanner which had also been dropped during removal. Alas the job had caused the breaking of one of the feed/return pipes to the matrix. Whilst obtaining a replacement matrix from a local fiesta specialist I found out that an early XR2 carb would solve the other problem. The MOT took place at the end of March and the car got an age related plate at the beginning of the wettest April this century. With no weather gear very little mileage was put on the new engine for some weeks. Now, at the start of June, with a new exhaust fitted last week things are beginning to look very good. The Jester seems to be very lively, handles very well and always gets a reaction from people - not all good, but it is never ignored. It does seem to be very popular with females - on more than one occasion I have been asked if they can have a go in my car! As the summer progresses I hope to attend more club events - weather permitting and no doubt I will sort out some of the jobs that have not yet been tackled like the inner wheel arches. Best wishes Lindsay
Chick
PS. The problem with heater fan turned out to be faulty switch!!!! |
 |
Sylva Leader
- Gilly's Sylva Leader 400 fitted with a Fiat 2.0ltr twin cam,
bored to 2043cc
|
 |
Tiger Super 6
Tommy Horton's Tiger Super Six |
 |
Tiger Super 6
Ade Ballard sends the following details on his car: Built between 2003 - 2006 and SVA'd and registered 2006. Engine is Ford Zetec 2.0 with twin 45DCOE Weber carbs, Webcon Alpha engine management system and lightened flywheel. It's taxed and insured all year round and is used whenever I can. Always gets a good blast on Christmas Day! |
 |
Tiger 6
Broni's Tiger 6 This car was built by my husband taking him 14 months to complete, the work was carried out mainly at weekends. However if I walked in the garage he would give me a pair of overalls, and the dirtiest job he could find, to keep me involved. Registered August 2001 after failing SVA test first time on minor items. Total cost to build £7800.00. This cost will increase as further modifications are made It was a first time build for him and was originally going to be his car. As he neared the end of the build, a twin engined version caught his attention, and this one became mine. In its first year on the road it was used mainly at weekends. Now I use it throughout the summer months whenever I can, even to do the shopping. Having joined the Kent Kit Car Club we have attended many shows and events through out the country. This car can often be seen trekking up and down motorways loaded with a gazebo and chairs. We have been pleasantly surprised how much we can load in to the car, and how comfortable the car is over long journeys. The best advice I can give any one who is thinking of building a kit car is, Stop thinking just do it. Do however give your partner a photo to remind them who the stranger in the garage is. |
|
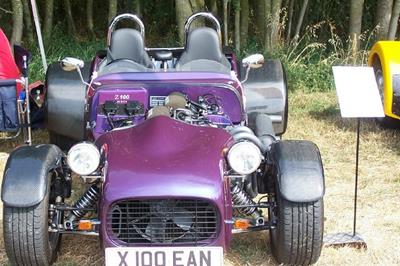
Tiger 6
Ian's Z100 This car has taken 3 1/2 years to build mainly over the winter months on evenings and weekends and has cost more than originally budgeted for (please don't tell the wife). This was the first Z100 kit ordered and is one of only 3 sold in kit form. These cars are now only available from Tiger as completed cars. The build itself was reasonably straightforward and most things came together with only a few brain teasing problems. I would like to thank Chris Allenson at Z cars for his support when it came to dealing with the tricky parts under the bonnet. The paintwork on the vehicle is one of the few parts of the build that I put out to the professionals. The colour is Rover Amaranth Blue and was applied by a local body shop. It passed SVA on its second attempt having failed on some sharp edges, decibels to high and hand brake efficiency low. Registration was straight forward taking a week from SVA to the logbook arriving. |